Lab 1: Working with a Pipette
Lab 1: Working with a Pipette
Introduction
As more classes become integrated with laboratory techniques, the proper handling and care of different materials is crucial to such success. The objective of this lab was to learn how to correctly and accurately use micropipettors to measure small volumes of liquid.
The FGCU lab is equipped with the Eppendorf pipettes, particularly the 10-100 μL (yellow pipette) and the 100-1000 μL (blue pipette) versions. Any measurement above or below the defined range (listed on the top of the device) does not guarantee accuracy. By twisting the grooved wheel on top of the pipette, the desired measurement can be increased or decreased and read on the side of the device. Each pipette is to be used with a particular disposable tip in the sanitized plastic racks: yellow tip=yellow (100) pipette, blue tip=blue (1000) pipette. Tips are attached by opening the plastic rack, pressing the pipette down on to a tip to attach and quickly closing the rack to ensure contamination from the surrounding environment is not an issue. Tips may be reused for the same solution, but always replaced when changing solutions, sterile solutions or if it become contaminated, dirty or not working properly.
There are two different 'stops' for the delivery button. Once the button is pushed, the first feel of resistance is the proper delivery amount, and the second resistance point is to ensure total delivery (blowout). The tab opposite the handgrip is the tip release button. Once this is pressed, the tip is ejected. The tip should be ejected into a waste container of some sort and never touched even with a gloved hand for obvious safety reasons.
Proper pipetting technique must be mastered early on to set the stage for a successful semester full of labs. While this lab will just be measuring out colored water and reaspirating it back in to the pipette to judge precision and accuracy, later on in the semester more intense solutions will be introduced.
Methods and Materials
PART I: In order to get familiar with how to handle the pipettes, the Eppendorf 100 μL was set to 10 μL by rotating the grooved wheel. The micropipettor was then pressed into the box of small (yellow) tips, attaching a tip firmly to ensure an airtight seal. The top button was the pushed down in preparation for aspirating the liquid. Held vertically upright, the tip was immersed about 2mm into the red food coloring and the button was released slowly. The liquid was then dispensed into the waste container by pushing the button until the first stop, waiting a second, and then the blowout was initiated. The tip was then ejected into the waste container as well.
PART II:A piece of saran wrap was placed on the workbench. The Eppendorf 100 μL was equipped with a tip and set to 40 μL. The red food coloring was drawn up and then placed on the saran wrap. The tip was then ejected into the waste container. This process was then repeated with 50 μL of yellow food coloring, 20 μL of blue food coloring and 30 μL of green food coloring so as to create a single droplet on the saran wrap. The total volume of the drop was recorded (140 μL) and the color was noted (black). The Eppendorf 1000 μL was then equipped with a tip, set to the total volume and the drop was then aspirated in totality back into the pipette slowly to ensure no air bubbles.
PART III: The Eppendorf 1000 μL pipette was first equipped with a tip. For the first test, 200 μL of red food coloring and 300 μL of blue food coloring were placed into a microcentrifuge tube, remembering to eject the tip in between measurements so as to not ensure contamination. The total volume was then recorded and the color mixed was noted. (Table 1) For the second test, 250 μL of green food coloring and 200 μL of yellow food coloring were placed into a microcentrifuge tube, total volume recorded and the color mixed was noted. (Table 1) A new tip was placed on the pipette and adjusted to the total volume of the first mixture and was aspirated back into the pipette to judge accuracy. This was repeated for the second mixture as well.
Results
Table 1. Summary of volumes and colors from Part III.

References
“Experiment #1: Pipette Calibration.” University of Illinois at Chicago. Accessed online 19 August 2016 at <http://www2.chem.uic.edu/min/chem455/docs/Lab_1.pdf>.
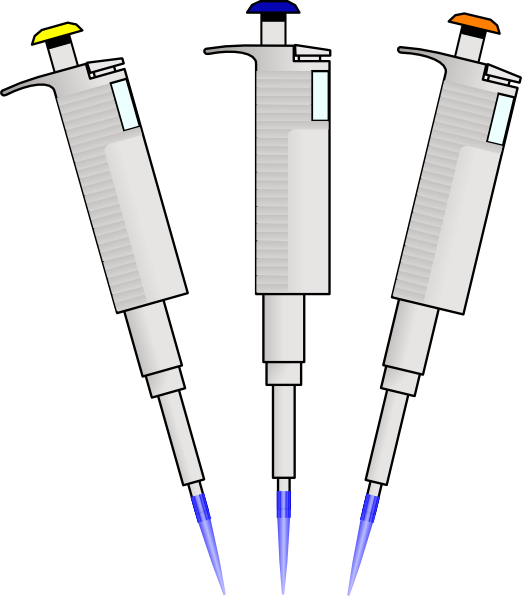
Ralo. (2012, January 18). Pipettes Clip Art [Digital image]. Accessed online 30 August 2017 at <http://www.clker.com/cliparts/A/Q/E/u/k/6/pipettes-hi.png>.
 |
| (Photo: Ralo) |
As more classes become integrated with laboratory techniques, the proper handling and care of different materials is crucial to such success. The objective of this lab was to learn how to correctly and accurately use micropipettors to measure small volumes of liquid.
The FGCU lab is equipped with the Eppendorf pipettes, particularly the 10-100 μL (yellow pipette) and the 100-1000 μL (blue pipette) versions. Any measurement above or below the defined range (listed on the top of the device) does not guarantee accuracy. By twisting the grooved wheel on top of the pipette, the desired measurement can be increased or decreased and read on the side of the device. Each pipette is to be used with a particular disposable tip in the sanitized plastic racks: yellow tip=yellow (100) pipette, blue tip=blue (1000) pipette. Tips are attached by opening the plastic rack, pressing the pipette down on to a tip to attach and quickly closing the rack to ensure contamination from the surrounding environment is not an issue. Tips may be reused for the same solution, but always replaced when changing solutions, sterile solutions or if it become contaminated, dirty or not working properly.
There are two different 'stops' for the delivery button. Once the button is pushed, the first feel of resistance is the proper delivery amount, and the second resistance point is to ensure total delivery (blowout). The tab opposite the handgrip is the tip release button. Once this is pressed, the tip is ejected. The tip should be ejected into a waste container of some sort and never touched even with a gloved hand for obvious safety reasons.
Proper pipetting technique must be mastered early on to set the stage for a successful semester full of labs. While this lab will just be measuring out colored water and reaspirating it back in to the pipette to judge precision and accuracy, later on in the semester more intense solutions will be introduced.
 |
| (Photo: Lauren Lukasik) |
PART I: In order to get familiar with how to handle the pipettes, the Eppendorf 100 μL was set to 10 μL by rotating the grooved wheel. The micropipettor was then pressed into the box of small (yellow) tips, attaching a tip firmly to ensure an airtight seal. The top button was the pushed down in preparation for aspirating the liquid. Held vertically upright, the tip was immersed about 2mm into the red food coloring and the button was released slowly. The liquid was then dispensed into the waste container by pushing the button until the first stop, waiting a second, and then the blowout was initiated. The tip was then ejected into the waste container as well.
PART II:A piece of saran wrap was placed on the workbench. The Eppendorf 100 μL was equipped with a tip and set to 40 μL. The red food coloring was drawn up and then placed on the saran wrap. The tip was then ejected into the waste container. This process was then repeated with 50 μL of yellow food coloring, 20 μL of blue food coloring and 30 μL of green food coloring so as to create a single droplet on the saran wrap. The total volume of the drop was recorded (140 μL) and the color was noted (black). The Eppendorf 1000 μL was then equipped with a tip, set to the total volume and the drop was then aspirated in totality back into the pipette slowly to ensure no air bubbles.
PART III: The Eppendorf 1000 μL pipette was first equipped with a tip. For the first test, 200 μL of red food coloring and 300 μL of blue food coloring were placed into a microcentrifuge tube, remembering to eject the tip in between measurements so as to not ensure contamination. The total volume was then recorded and the color mixed was noted. (Table 1) For the second test, 250 μL of green food coloring and 200 μL of yellow food coloring were placed into a microcentrifuge tube, total volume recorded and the color mixed was noted. (Table 1) A new tip was placed on the pipette and adjusted to the total volume of the first mixture and was aspirated back into the pipette to judge accuracy. This was repeated for the second mixture as well.
 |
| (Photo: Lauren Lukasik) |
Table 1. Summary of volumes and colors from Part III.

Discussion
While this lab was intended as an exercise in the graceful art of pipetting, every time we aspirated the solution back in to the pipette in both parts II & III, it was 𝓯𝓵𝓪𝔀𝓵𝓮𝓼𝓼! Slowly but surely all the liquid was air bubble-less and the saran wrap/microcentrifuge tubes were residue-less. In part II it was important to realize to switch to a 1000 μL pipette to aspirate the liquid off of the saran wrap, as the black colored drop totaled 140 μL, in which case using the 100 μL pipette would not be able to accurately measure that volume. In part III, tube #1 was totaled to 500 μL and created a dark purple color. Tube #2 was totaled to 450 μL and remained a green color as the yellow was not in enough capacity to drastically alter the coloring. While the biggest source of error would be human error in all of the minuscule measurements, by taking our time and practicing in part I, we kept this error to a minimum as evidenced by the complete aspiration of the mixtures.
I now believe I am a ⓟⓘⓟⓔⓣⓣⓔ ⓜⓐⓢⓣⓔⓡ.
 |
| (Photo: Lauren Lukasik) |
“Experiment #1: Pipette Calibration.” University of Illinois at Chicago. Accessed online 19 August 2016 at <http://www2.chem.uic.edu/min/chem455/docs/Lab_1.pdf>.
“Introduction to Micropipetting: Working with Small
Volumes.” Northwest Association for Biomedical Research. Accessed online 19
August 2016 at <https://www.nwabr.org/sites/default/files/IntroToMicropipettingJuly2012.pdf>.
Ralo. (2012, January 18). Pipettes Clip Art [Digital image]. Accessed online 30 August 2017 at <http://www.clker.com/cliparts/A/Q/E/u/k/6/pipettes-hi.png>.


Well done. Always think about the 'pitfalls' when working with a pipette.
ReplyDelete